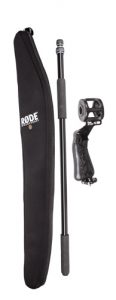
 The Library Tech Commons offers a collection of audio/visual hardware for a variety of video production needs. Equipment can be checked out by UCSF faculty, staff and students. The Gitzo Boom Pole and Rycote pistol grip mount allow you to attach and extend the reach of a shotgun mic.
Use cases for this kit include:
- Raise a shotgun mic up and out of the camera’s view
- Extend a shotgun mic into hard-to-reach places
Pairs with: Azden Shotgun Microphone and H5 Handy Recorder.
To use the Gitzo Boom Pole, follow these basics steps.
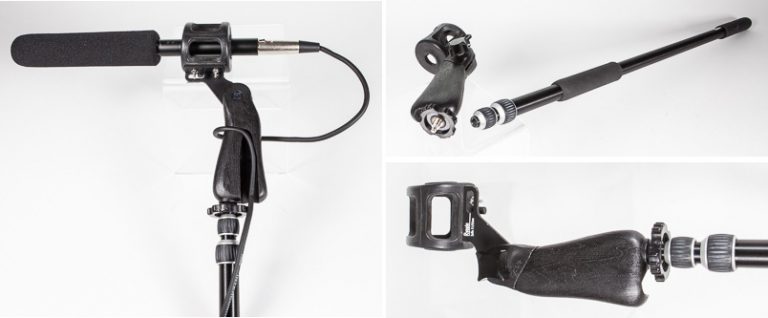
- Attach Rycote pistol grip mount – Carefully align the Rycote mount with the threaded bolt on top of the Gitzo pole, and rotate/screw it down until firmly in place.
- Attach shot mic – Slide a shotgun mic into the rubberized Rycote mount holder. The back of the mic should protrude just slightly from the back of the mount.
- Connect cables – Connect the necessary cables to you mic, and recording device. The Rycote handle provides an indentation for neatly threading the cable down towards the base of the pole.
- Extend the pole – As needed, rotate the twist-locks to loosen a segment of the pole, extend the pole, and then re-tighten until firmly locked into place. Start with with lower segment, because it is thicker and more stable, and if addition reach is needed, also extend the upper segments.
- Adjust mount – To angle the mic, loosen the adjustment knob on the Rycote pistol grip mount, and angle the shotgun mic accordingly.
- Record – Using your recording device, adjust levels and record!
These additional notes will help you use the Gitzo Boom Pole smarter and avoid common pitfalls.
- What is a “boom mic?” – Any microphone mounted on an extension pole, and detached from the video camera. Boom mics are usually operated by an additional person who is working along side the camera operator. Boom mics free the subjects (and camera) to move about more freely in the scene.
- Managing that cable – Your shotgun mic will likely be connected to an external audio recorder, or a camera, via a lengthy XLR cable. To minimize your chances of getting tangled up, or worse yet, catching the cable on something and damaging equipment, we recommend wrapping the mic cable around the length of the boom pole. You can leave a little slack near the base of the pole, and keep that loosely bundled in your hand for flexibility.
- Boom Mic fundamentals – http://www.premiumbeat.com/blog/the-fundamentals-of-the-boom-operator-and-location-mic-techniques/
- Positioning a boom mic – https://youtu.be/wJ-4MlBILDI
The approximate value of this kit is $300. If anything is lost or damaged during your loan, you are responsible for replacing those items.
Reservations can be made using our online reservation calendar.
The maximum loan time for this device is 4 days. Staff are available Monday, Tuesday and Thursday from 9am to 12n, in CL240 of the Parnassus Library for equipment check-out. Equipment can only be used for UCSF related activities, by UCSF students, staff and faculty. More information about the reservation process and our policies can be found here: How to Reserve Equipment.